The mistake that makes laminate floors separate over time
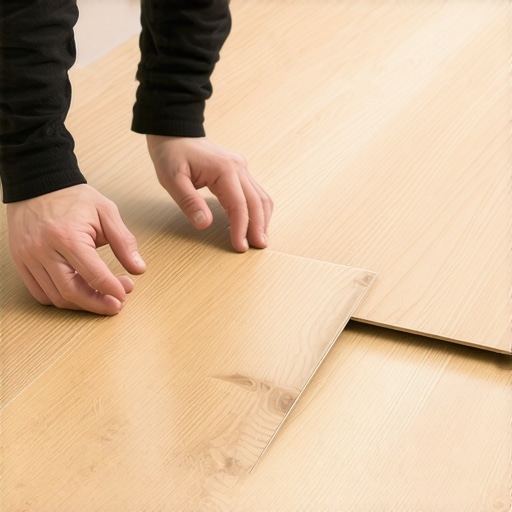
Most guys skip the leveling compound. They think the underlayment will hide the dip. It won’t. I spent three days grinding concrete on a job last month just so the floor wouldn’t click like a castanet. I have seen floors that cost five thousand dollars fail in six months because the installer was too lazy to check the subfloor with a straightedge. You see the gaps opening up at the header joints and you think it is the wood. It is not the wood. It is the physics of a hollow spot. Laminate flooring is a floating system that relies on mechanical tension. When that tension is compromised by vertical movement, the locking system fails. This is not a matter of if, but when. If your subfloor has a valley, every time you step on that plank, you are bending a high-density fiberboard tongue. Eventually, that tongue snaps or fatigues. Then the gap appears. Then the dirt gets in. Then the floor is finished.
The hidden geography of a flat subfloor
Subfloor leveling and floor flatness are the most important factors in preventing laminate separation. A subfloor must be flat to within 3/16 of an inch over a 10-foot radius. If the concrete slab or plywood deck has deviations beyond this tolerance, the locking mechanism will undergo excessive stress during foot traffic. This is a structural engineering reality. When you walk across a floor, your body weight applies hundreds of pounds of pressure per square inch. If there is air beneath the plank, that pressure is converted into torque. The tongue and groove are designed to hold planks together horizontally, not to act as a structural bridge over a canyon. I have walked into too many homes where the laminate feels like a trampoline. That bounce is the sound of your floor dying. You need to use a self-leveling underlayment or a high-quality patch to fill those voids before a single plank hits the ground. If you do not, you are just waiting for the joints to pull apart.
Why your click system is failing under pressure
Laminate click-lock systems fail because of mechanical fatigue caused by vertical deflection. Most HDF cores are made of compressed wood fibers and resin which have a specific tensile strength. When a floor is installed over an uneven surface, the joint acts as a hinge. Constant pivoting leads to micro-fractures in the locking profile. Over time, these fractures reduce the friction that holds the planks together. Once the friction is gone, the natural expansion and contraction of the home pulls the planks apart. This is why you see gaps at the ends of the boards. It is also why laminate flooring is often misunderstood. People blame the humidity, but the humidity only finishes what the bad subfloor started. You cannot fix this with wood glue once the tongue has snapped. The integrity of the entire room is based on the initial prep work. If you are moving from a carpet install to laminate, you cannot assume the floor is ready. Carpet hides sins. Hard surfaces expose them.
“A floor is only as good as the subfloor beneath it; deflection is the enemy of every joint.” – Master Flooring Axiom
The friction of the improper underlayment
Underlayment thickness and compression strength determine the long-term stability of the floating floor joints. Many homeowners think a thicker, softer pad will make the floor feel more comfortable, but this is a dangerous myth. Too much cushion allows for too much vertical movement. A high-density underlayment with a low compression set is required to support the locking joints. If the pad is too squishy, the floor will sink under your feet, putting immediate stress on the click-lock mechanism. I prefer a dense foam or a rubberized membrane that provides sound dampening without sacrificing structural support. You also have to consider the vapor barrier. On a concrete slab, moisture is constantly trying to move upward. If you do not have a 6-mil poly film, that moisture will hit the bottom of your laminate and cause the edges to swell. Once the edges swell, they push against each other and pop the joints open. It is a chemical and physical assault on your flooring.
Expansion gaps and the perimeter paradox
Expansion gaps at the perimeter of the room allow laminate planks to move as a single unit during seasonal humidity changes. Every laminate floor needs at least 1/4 inch to 1/2 inch of space between the edge of the flooring and the wall. If you run the floor tight against the baseboards or a heavy kitchen island, the floor has nowhere to go when it expands. It will buckle or, more commonly, the tension will cause the weakest joint in the middle of the room to pull apart. Think of the floor like a giant sheet of ice on a lake. It needs room to breathe. I see people install heavy cabinets right on top of their floating floor. This locks the floor in place. When the house settles or the air gets dry, the floor tries to shrink, but it is pinned down. The resulting force is enough to snap the locking tongues clean off. You must maintain that expansion zone around every vertical obstruction, including pipes and door frames.
Moisture vapor and the concrete slab
Moisture vapor emission rates (MVER) from concrete subfloors can degrade the adhesive resins in laminate cores. Even if a slab looks dry, it is likely emitting water vapor that can be measured with a calcium chloride test. According to ASTM F1869, these levels must be within the manufacturer’s limits. If the vapor pressure is too high, it saturates the HDF core, causing linear expansion. This expansion is not uniform. The bottom of the plank expands more than the top, causing cupping. Cupping puts immense pressure on the groove wall, eventually leading to structural failure. This is why laminate is generally a poor choice for showers or bathrooms where standing water and high humidity are constant. You are essentially putting a compressed sawdust product in a swamp. Even the best waterproof laminate has limits. The topical waterproofing does nothing to stop the vapor coming from the slab below.
Comparing materials for structural integrity
Subfloor preparation requires choosing the right materials to ensure the laminate floor remains stable over decades. Different substrates require different approaches to leveling and moisture mitigation. Below is a comparison of common subfloor types and their requirements.
| Subfloor Type | Primary Challenge | Required Preparation | Stability Rating |
|---|---|---|---|
| Concrete Slab | Moisture Vapor | 6-mil Poly Film / Leveling | High |
| Plywood / OSB | Deflection / Flex | Screw Down / Sanding | Medium |
| Existing Tile | Grout Line Telegraphed | Patching / Self-Leveler | Medium |
| Old Hardwood | Movement / Squeaks | Solidify Base / Underlayment | Low |
As the table shows, concrete is the most stable but carries the highest risk of moisture damage. Plywood is easier to work with but often lacks the stiffness required for modern thin-plank laminate. If you are installing over existing tile, you must ensure the grout lines are filled. Otherwise, the laminate will eventually mirror those depressions, leading to the same joint separation issues we see with unlevel concrete.
The checklist for a permanent installation
Installation protocols must be followed to the letter to avoid warranty denial and floor failure. This checklist represents the professional standard for a high-performance laminate floor setup. Skip one step, and you are gambling with your investment.
- Acclimate the flooring in the room for at least 48 hours to reach equilibrium moisture content.
- Check the subfloor flatness using a 10-foot straightedge; no dip should exceed 3/16 of an inch.
- Verify that the subfloor moisture is within 2 percent of the flooring material.
- Install a high-density underlayment specifically rated for floating floors.
- Maintain a minimum 3/8 inch expansion gap around the entire perimeter.
- Stagger the end joints by at least 8 to 12 inches to ensure structural overlap.
- Avoid T-moldings only if the room length is under the manufacturer maximum (usually 30 feet).
Why laminate belongs nowhere near showers
High-moisture environments like showers and laundry rooms create a hydrostatic pressure environment that laminate cannot withstand. While many brands market themselves as waterproof, they are referring to topical spills, not ambient humidity or subfloor saturation. In a bathroom, steam penetrates the expansion gaps and reaches the unprotected HDF core. Once the core absorbs moisture, it undergoes irreversible thickness swell. This swelling forces the locking mechanisms out of alignment. Once they are out of alignment, the floor starts to separate. If you want a floor that lasts near a shower, you should look at LVP with a rigid core or traditional tile. Tile requires a cement board or uncoupling membrane, which is a different beast entirely, but it won’t pull apart because of a little steam.
“All wood and wood-based flooring will expand and contract with changes in relative humidity.” – NWFA Technical Guidelines
Moving from carpet install to hard surfaces
Carpet removal reveals the true state of a subfloor, which is usually a mess of tack strips, staples, and uneven joints. When you do a carpet install, the pad hides everything. When you pull it up to put down laminate, you will likely find that the subfloor panels are not flush. You must sand down the high spots and fill the low spots. Most installers just pull the carpet and start clicking planks. That is a recipe for disaster. You need to spend more time on the subfloor prep than on the actual installation of the laminate. If the plywood seams are peaking, the laminate will teeter on those peaks and eventually the groove side of the joint will split. Use a floor sander on the wood seams and a feather-finish patch on the holes. It is a dirty, dusty job, but it is the only way to ensure the planks do not separate three years down the line. I always tell my clients that the floor is just the skin. The subfloor is the skeleton. If the skeleton is crooked, the skin will eventually tear.