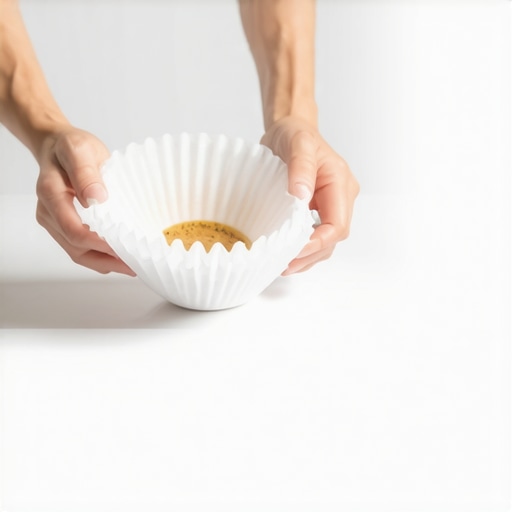
The ‘Coffee Filter’ trick for smoothing floor leveler bubbles
I spent three days grinding concrete on a job last month just so the floor wouldn’t click like a castanet. Most guys skip the leveling compound because they think the underlayment will hide the dip. It won’t. I was in a high-rise downtown where the slab looked like the rolling hills of Kentucky. The client wanted a high-gloss laminate with a zero-threshold transition into the showers. If I hadn’t spent those seventy-two hours with a diamond-cup wheel and a HEPA vacuum, that floor would have failed within six months. You could smell the pulverized lime and the WD-40 on my gear for weeks. This is the reality of professional flooring. It is a war against gravity and moisture. When you pour a self-leveling underlayment, you are fighting the clock and the physics of outgassing. The ‘Coffee Filter’ trick for smoothing floor leveler bubbles is a veteran secret used to fix pinholes and ridges that appear as the material sets. This technique ensures a glass-like surface that is essential for thin-profile flooring like laminate or luxury vinyl plank.
The hidden physics of a flat subfloor
Self-leveling underlayment and floor leveling compounds require a pristine concrete slab or plywood subfloor to achieve a high-compression strength finish. When you pour these cementitious slurries, air trapped in the pores of the substrate begins to rise. This creates tiny chimneys that manifest as bubbles on the surface. If these bubbles pop late in the drying cycle, they leave behind craters or sharp ridges. A professional knows that a flat floor is not just about aesthetics. It is about the structural integrity of the locking mechanisms in your laminate or the bond of your thin-set in a shower. A deviation of more than 1/8 inch over ten feet is a death sentence for most modern flooring materials. You must understand the molecular weight of the polymers in your leveler. These chemicals are designed to keep the mixture fluid, but they also increase surface tension, which is why bubbles get trapped. Most installers ignore these pinholes, thinking the carpet padding will mask them. This is a mistake. Those tiny craters are weak points where the leveler can eventually spall or crack under the weight of heavy furniture.
“A floor is only as good as the subfloor beneath it; deflection is the enemy of every joint.” – Master Flooring Axiom
The coffee filter method for perfect surfaces
Smoothing floor leveler bubbles using the coffee filter trick involves the application of a damp filter to the green stage leveler to eliminate pinhole ridges and surface tension. Once the pour has reached a point where it is no longer liquid but still soft enough to take an impression, you use a damp coffee filter to lightly burnish the surface. The texture of the paper is fine enough to not leave scratches, yet strong enough to collapse the air pockets. This is significantly better than using a trowel, which often leaves “chatter marks” or creates low spots. You are essentially polishing the cement while it is in its most vulnerable state. This technique is particularly useful in shower floor leveling where the slope must be precise for drainage. If you have ridges in your leveler, your waterproofing membrane will not sit flat, leading to pooling water and mold growth behind the tile. The lint-free nature of the coffee filter ensures that no foreign fibers are introduced into the wet cement, which could compromise the bond of your next layer of adhesive.
Why your subfloor is lying to you
Subfloor flatness is often misjudged by the naked eye because ambient lighting and shadows hide deflections and humps in the concrete. You need to use a ten-foot straightedge or a rotating laser level to find the truth. The slab might look fine until you try a carpet install and realize the tack strips are hovering over a void. Most homeowners think that a thick underlayment is the solution. I am telling you now, too much cushion actually causes the locking mechanisms on LVP to snap under pressure. You want a firm, flat surface, not a bouncy one. When we talk about laminate installation, the expansion gap is the most misunderstood part of the process. If your floor isn’t level, the boards will move vertically every time you walk on them. This movement creates friction at the joints, eventually wearing down the decorative layer and causing the floor to squeak. This is why the coffee filter trick is so vital. It removes those micro-ridges that act like sandpaper against the bottom of your flooring boards. You are building a foundation that will last fifty years, not five.
| Material Type | Max Deviation allowed | Compression Strength (PSI) | Recommended Leveling Method |
|---|---|---|---|
| Laminate Flooring | 1/8 inch over 10 ft | 3000+ PSI | Self-leveling pour with bubble mitigation |
| Luxury Vinyl Plank | 3/16 inch over 10 ft | 3500+ PSI | Full slab skim coat |
| Ceramic Tile | 1/4 inch over 10 ft | 4000+ PSI | Mud bed or polymer-modified leveler |
| Broadloom Carpet | 1/2 inch over 10 ft | 2500+ PSI | Spot patching and sanding |
Cement chemistry and the race against time
Polymer-modified cement used in floor leveling has a working time of roughly twenty minutes depending on ambient temperature and humidity. The chemical reaction is exothermic, meaning it generates heat as it cures. If your room is too hot, the leveler will “snap” or set prematurely, leaving you with a mess that requires mechanical grinding. This is where the coffee filter trick becomes a localized lifesaver. You can fix specific areas without ruining the entire pour. I always keep a spray bottle of water and a pack of filters in my kit. If I see a cluster of bubbles forming as the material begins to stiffen, I can mist the area and lightly buff it out. You have to be careful not to add too much water. Adding water to the surface of curing cement can cause the top layer to become friable, meaning it will turn to dust once dry. You are looking for a structural bond, not a cosmetic fix. The chemistry must be respected. Always use a primer. If you don’t prime the slab, the dry concrete will suck the moisture out of the leveler so fast it won’t have time to flow, resulting in a surface that looks like the surface of the moon.
A checklist for the perfect leveler pour
- Mechanical grinding of the slab to remove paint, oil, and laitance.
- HEPA vacuuming to ensure no dust particles interfere with the primer bond.
- Perimeter isolation strips to allow for building movement and prevent cracking.
- Two coats of high-solids acrylic primer applied with a soft-bristle broom.
- Precision water measurement using a calibrated bucket to maintain PSI ratings.
- High-speed mixing for exactly two minutes to fully activate the polymers.
- Use of a spiked roller to release initial air bubbles during the flow.
- The coffee filter buffing technique for pinholes during the green stage.
Carpet padding will not save a bad pour
Carpet installation professionals often tell clients that a thick pad will hide subfloor imperfections, but this is a structural lie that leads to premature wear. A dip in the floor causes the carpet fibers to stretch and pull every time they are compressed into the void. Over time, this creates a permanent wrinkle in the carpet that cannot be stretched out. If you are doing a high-end carpet install, you should still level the floor. I have seen custom wool carpets ruined because the installer didn’t want to spend the time on a bag of leveler. The same goes for showers. If the subfloor under your shower pan isn’t perfectly level, the weight of the water and the user will cause the pan to flex. This flex will eventually crack the grout lines or, worse, the waterproof seal. Using the coffee filter trick to ensure the area under the pan is perfectly smooth prevents these pressure points. You have to think like an engineer. You are managing the distribution of weight across a horizontal plane. Any deviation is a point of failure. I don’t care if you’re installing the cheapest laminate or the most expensive marble. The prep is the same. You grind, you prime, you pour, and you polish. Anything less is just a temporary decoration that will fall apart before the paint on the walls is dry.
“Deflection is the silent killer of the modern open-concept home; rigid floors require rigid foundations.” – TCNA Technical Bulletin
The 1/8 inch that ruins everything
Micro-adjustments in floor height are the difference between a professional finish and a DIY disaster. When you are transitioning from a laminate floor to a tiled shower, that 1/8 inch difference can cause a tripping hazard or require an ugly, bulky T-molding. I hate T-moldings. They are the mark of an installer who didn’t plan ahead. By using high-flow levelers and the coffee filter smoothing technique, you can feather your transitions down to nothing. This creates a “zero-threshold” look that is highly sought after in modern architecture. It requires a level of patience that most guys don’t have. They want to pour the bag and go to lunch. But if you stay and watch the material cure, you can manipulate it. You can see the air escaping and you can intervene. That is the 25-year veteran difference. You aren’t just dumping a bag. You are crafting a surface. The moisture meter is your best friend here. Never install a floor over a leveler until it has reached the moisture content specified by the manufacturer. Usually, this is below 3 percent for wood and 5 percent for breathable products. If you trap moisture under your floor, you are inviting mold and adhesive failure. The coffee filter trick doesn’t just make the floor look better. It ensures the surface is dense and closed-off, preventing moisture from migrating upward into your flooring material. This is structural engineering on your hands and knees. It is hard work, it is dusty, and it is the only way to do it right. The next time you see a bubble in your leveler, don’t ignore it. Grab a filter and get to work. Your floor depends on it.