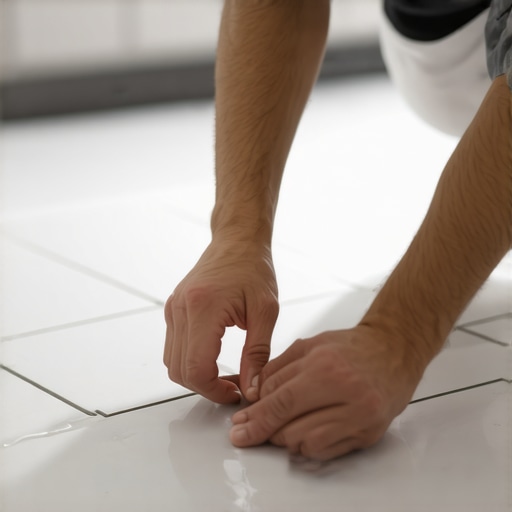
The Tap Test for Finding Hollow Kitchen Floor Tiles
I spent three days grinding concrete on a job last month just so the floor wouldn’t click like a castanet. Most guys skip the leveling compound. They think the underlayment will hide the dip. It won’t. I walked into a kitchen where the homeowner complained about a clicking sound every time they stepped near the fridge. I took a heavy brass rod and tapped the tile. It sounded like a drum. I had to rip up twelve square feet of expensive Italian porcelain because the previous installer thought floor leveling was an optional suggestion. My knees still ache from the dust and the grinding, but it was the only way to fix a foundation that was lying to the finish material. If that concrete isn’t flat to within an eighth of an inch over ten feet, you are building a failure.
The hollow ring of a failed investment
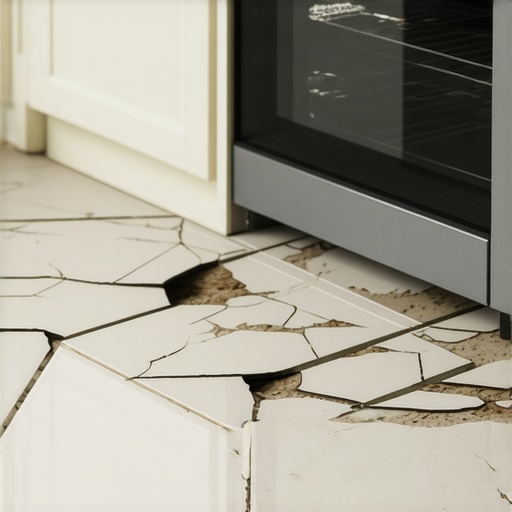
To find hollow kitchen floor tiles you must **perform a tap test using a solid object** like a broom handle, a copper pipe, or a specialized sounding rod. A **hollow, drum-like resonance** indicates that the mortar has detached from the tile or the subfloor, creating an **air pocket that compromises structural integrity**. Identifying these spots early prevents the tile from cracking under the weight of appliances. When you strike a solid tile, the sound should be a sharp, high-pitched ‘clack’ because the energy of the strike is transferred directly into the thermal mass of the subfloor. When you hit a hollow spot, that energy is trapped in an air gap. This gap acts as a resonator, magnifying the low-frequency vibrations. In a kitchen, these air pockets are usually found near the dishwasher or the sink where moisture might have seeped into the grout lines and weakened the thin-set. If you ignore that sound, the tile will eventually spider-web or pop completely out of its bed when someone drops a heavy pot.
Why your subfloor is lying to you
A subfloor lies when it appears flat but contains **micro-deviations and dips** that exceed the **industry standard of 1/8 inch over 10 feet**. These hidden valleys prevent mortar from making full contact with the tile, which eventually results in **hollow sounds and structural cracking** under heavy foot traffic. Most installers rely on their eyes, but your eyes are easily deceived by the sheen of a concrete slab. You need a ten-foot straightedge. When you lay that straightedge across the floor, any gap where you can slide a nickel through is a failure point. We call this floor leveling, and it is the most essential part of the process. If you are transitioning from tile to a carpet install, the level of that subfloor determines if your transition strip will sit flush or if it will become a trip hazard. Carpet can hide some sins, but tile is an unforgiving material. It has zero flex. If the subfloor dips, the tile must span that gap like a bridge. Eventually, that bridge collapses.
“A floor is only as good as the subfloor beneath it; deflection is the enemy of every joint.” – Master Flooring Axiom
The microscopic breakdown of mortar bonds
Mortar failure occurs at a molecular level when the **hydration process of the Portland cement** is interrupted by excessive heat or a porous subfloor that sucks the moisture out too quickly. This results in **poor crystalline interlocking** between the mortar bed and the tile backer, leading to a **weak mechanical bond** that sounds hollow. When we talk about thin-set, we are talking about a chemical reaction. The polymers in modern mortars are designed to create a bridge between the silicate of the tile and the substrate. If you ‘skin over’ the mortar by letting it sit too long before dropping the tile, you have already failed. The microscopic crystals cannot penetrate the tile surface. I have seen guys mix their thin-set with too much water to make it easier to spread. This is a death sentence for the floor. As that excess water evaporates, it leaves behind microscopic voids. Those voids are the ghosts in your floor that scream every time you walk on them.
How to swing the hammer for results
To perform a professional tap test, you must **move systematically across the floor in a grid pattern**, striking the center and all four corners of every tile. You are looking for **consistency in acoustics**, where any deviation toward a lower, bass-heavy sound marks a **debonded area that requires immediate attention**. I prefer using a heavy steel ball on a rod. It saves my back and gives a very clear tone. You start at the corner of the room and work your way toward the exit. In showers, this is even more vital. A hollow tile in a shower pan means water is sitting underneath that tile. That water will eventually rot the curb or cause mold to bloom in the thin-set. If you find a hollow spot in a wet area, you don’t just have a loose tile; you have a potential plumbing disaster.
The structural danger of poor floor leveling
Poor floor leveling creates **voids under the tile** that act as pressure cookers for mechanical stress, leading to **localized tile failure and grout disintegration**. Without a perfectly flat surface, the **notched trowel cannot leave a consistent bed of ridges**, leaving some areas of the tile completely unsupported by the mortar. This is where the physics of the floor comes into play. If you have a large format tile, say a 24 by 48 inch plank, and there is a 1/16 inch dip in the concrete, the tile will ‘teeter-totter’ on the high spot. Every time you step on the unsupported end, you are applying hundreds of pounds of pressure to a ceramic material with no tensile strength. It will snap. It is not a matter of if, but when. I always tell homeowners that I will spend more time on the floor leveling than I will on the actual tiling. If they don’t like the price of the leveler, they won’t like the price of replacing the whole floor in two years.
Why laminate and carpet installers hate bad tile
When a tile floor is installed poorly, it creates **irregular heights at the transitions** where it meets other materials like laminate or carpet. These **height variances make it impossible** to install a clean T-molding or a flush tack strip, resulting in a **haggard look and a dangerous tripping point**. Laminate installers need a flat surface just as much as tile guys do. If the tile at the doorway is tilting because of a hollow spot, the laminate transition will bounce. This bounce eventually snaps the locking mechanism on the laminate planks. It is a chain reaction of failure. When I do a carpet install next to a tile floor, I want that tile to be rock solid. If I am power-stretching carpet against a tile edge that is hollow, I might actually chip the tile just with the tension of the carpet stretcher.
The math behind the mortar notch
The success of a tile bond is determined by the **percentage of mortar coverage**, which should be at least **80 percent in dry areas and 95 percent in wet areas** like showers. To achieve this, you must use the **correct trowel notch size** and employ the ‘collapse the ridges’ technique to ensure no air is trapped. If you use a trowel that is too small, you won’t have enough mud to bridge the gaps in a subfloor that isn’t perfectly level. If the ridges don’t collapse, you have air channels running under your floor. Those channels are what you hear during the tap test. I use a 1/2 inch by 1/2 inch square notch for most large tiles. I back-butter every single piece. Back-buttering is the act of spreading a thin layer of mortar on the back of the tile itself before setting it. This ensures the chemical bond is established on both sides of the equation.
| Material Type | Subfloor Tolerance | Minimum Mortar Coverage | Acclimation Time |
|---|---|---|---|
| Porcelain Tile | 1/8 inch per 10 ft | 80% (Dry) / 95% (Wet) | 24 Hours |
| Natural Stone | 1/16 inch per 10 ft | 95% (Always) | 48 Hours |
| Laminate Wood | 3/16 inch per 10 ft | N/A (Underlayment) | 72 Hours |
| Glue-down Wood | 1/8 inch per 10 ft | 100% Adhesive | 7-10 Days |
Fixing the air pockets without the demo
You can fix minor hollow spots by **drilling small holes in the grout lines** and injecting a **high-strength, low-viscosity structural adhesive** into the void. This specialized epoxy or latex-based liquid **fills the air gap and rebonds the tile** to the substrate without the need for a full floor tear-out. This is a surgical strike. It doesn’t always work if the subfloor is actively moving or if the house has foundation issues. But if it is just a case where the installer didn’t get enough mud in one corner, injection can save the day. You have to be careful not to use too much pressure, or you will lift the tile and ruin the level of the whole floor. Once the adhesive is in, you weight the tile down with several five-gallon buckets of water and let it cure for 24 hours. Then you re-grout the holes, and the ‘thud’ becomes a ‘clack’ again.
- Gather a sounding tool such as a broom handle or specialized brass rod.
- Turn off any loud appliances or fans to ensure you can hear the acoustic feedback.
- Tap the center of each tile first, then move toward the edges and corners.
- Mark any hollow sounding areas with a piece of painter’s tape for further inspection.
- Check the grout lines around hollow tiles for hairline cracks or powdering.
- Verify if the hollow spots are concentrated near heat sources or water fixtures.
- Consult a professional if more than 20 percent of the floor sounds hollow.
“Coverage is king; if you see the ridges of the trowel when you pull up a failed tile, the installer never collapsed the mortar.” – TCNA Standard Practice
Final assessment of your kitchen floor should always be done before the furniture is moved back in. If you find the problems while the room is empty, the fix is ten times easier. Once that heavy refrigerator is sitting on a hollow tile, the clock is ticking. The vibration of the compressor alone can be enough to turn a small debonded area into a full-scale floor failure. Respect the subfloor, watch your mortar chemistry, and never trust a floor that sounds like a drum.