How to Hide Ugly Laminate Gaps Under Door Frames
The hidden mechanics of the door frame gap
Most guys skip the leveling compound. They think the underlayment will hide the dip. It won’t. I spent three days grinding concrete on a job last month just so the floor wouldn’t click like a castanet. That job had a massive gap under the master bedroom door because the previous installer used a dull handsaw and zero patience. When you see a gap under a door frame, you aren’t just looking at a mistake. You are looking at a failure to respect the physics of the floating floor. Laminate is a composite material made of high-density fiberboard, or HDF, which reacts violently to changes in relative humidity. If you do not leave enough room, it buckles. If you leave too much, it looks like a canyon. Fixing it requires a blend of chemical adhesives and precision carpentry that most DIY videos ignore because they want to sell you a quick fix. I do not do quick fixes. I do things that last twenty years.
The physics of the perimeter gap
Laminate gaps under door frames are caused by hyroscopic expansion and improper jamb undercutting where the floating floor fails to reach the door casing. To hide these voids, professionals use color-matched flexible sealants, plank shifting suction cups, or architectural plinth blocks to maintain structural integrity while concealing subfloor irregularities. Most people forget that a floor is not a static object. It is a living, breathing assembly. The phenolic resin in the wear layer is tough, but the core is thirsty. When the humidity hits sixty percent, that board is going to grow. If your gap is visible, it usually means the installer was afraid of the undercut saw. They cut the board short because they did not want to risk hitting the structural framing. This creates a shadow line that catches every piece of dust and hair in the house.
“A floor is only as good as the subfloor beneath it; deflection is the enemy of every joint.” – Master Flooring Axiom
Why your subfloor is lying to you
Subfloor flatness is the primary reason laminate planks pull away from door frames, as vertical deflection causes the locking mechanisms to disengage over time. A leveling compound or self-leveling underlayment must be applied to any concrete slab or plywood substrate with a variance greater than 1/8 inch over a ten-foot radius. I have seen guys try to fix a gap with a piece of scrap wood and some wood glue. That is garbage. If the floor is dipping because the subfloor wasn’t leveled, no amount of putty will save you. The floor will move every time someone walks on it. That movement will break the bond of your filler. You have to understand the hydrostatic pressure of the slab. In a basement or a room near showers, the moisture levels fluctuate even more. This makes floor leveling not just an option, but a requirement. If you are doing a carpet install elsewhere in the house, you might get away with a few dips. With laminate, you are playing a game of thousands of an inch. [IMAGE_PLACEHOLDER]
The geometry of the perfect undercut
Undercutting door jambs involves using an oscillating multi-tool or a flush-cut saw to remove a section of the door casing so the laminate plank can slide underneath. This creates a zero-clearance visual while still allowing for linear expansion of the HDF core. The trick is using a scrap piece of the actual floor and the underlayment as a height guide. You lay the scrap on the subfloor, put your saw on top of it, and cut. This ensures the blade is at the exact height needed. If you messed this up and the gap is already there, you have to get creative. You are looking at a shadow gap. Shadow is the enemy of a clean finish. To eliminate the shadow, you need to fill the void with something that has the same refractive index as the floor finish. Most cheap caulks are too matte. They look like play-dough. You need a high-solids acrylic that stays flexible. It has to handle the floor moving back and forth without cracking or pulling away from the wood.
The chemistry of color matched sealants
Flexible floor sealants and siliconized acrylics are engineered to bridge the expansion gap between laminate flooring and vertical surfaces like door frames. These elastomeric compounds offer high-movement capability, meaning they can compress and stretch without adhesive failure. When you are looking for a product, avoid pure silicone. Nothing sticks to silicone, not even more silicone. If you ever need to touch it up, you are in trouble. You want an acrylic-based filler designed for the flooring industry. These are often rated by their shore hardness. You want something firm enough to resist a vacuum cleaner but soft enough to let the floor breathe. I have seen installers use grout. Never use grout. Grout is rigid. The first time the weather changes, that grout will crumble into sand and you will be right back where you started with an ugly gap and a mess to clean up.
| Solution Type | Flexibility Rating | Best Use Case | Durability |
|---|---|---|---|
| Acrylic Caulk | High | Small gaps under 1/4 inch | 5-10 Years |
| Plinth Blocks | None | Massive gaps or rotting jambs | Lifetime |
| Plank Shifting | N/A | Gaps caused by board creep | Variable |
| Wood Putty | Low | Non-moving decorative areas | 2-3 Years |
The 1/8 inch that ruins everything
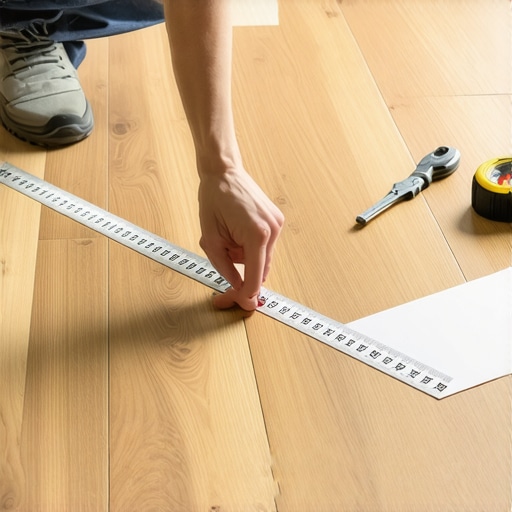
Precision measurements are the difference between a professional floor installation and a DIY failure that requires cosmetic hiding. A gap larger than 3/16 inch at a door transition exceeds the tensional limits of most joint fillers. I tell my apprentices that the tape measure is the most dangerous tool in the bag. If you misread it, you waste a board. If you misread it at a doorway, you waste a whole day. When you find yourself with an ugly gap, sometimes the best move is the hardest one. You might have to pull up the baseboards and use a floor jack or a suction cup tool to shift the entire row of planks toward the door. This only works if you have a gap on the other side of the row to steal from. It is a game of millimeters. You are moving a massive weight of wood and resin. It requires a specific kind of suction cup, the kind glaziers use for heavy glass. You lock it onto the plank and hit the tool with a dead-blow hammer. If you use a regular hammer, you will shatter the locking tongue. It is about controlled force.
“Any floating floor system requires a minimum of 1/4 inch expansion space at all vertical obstructions to prevent peaking.” – NWFA Technical Manual
The regional climate factor in floor movement
Relative humidity in regions like the Pacific Northwest or the Deep South causes laminate core boards to expand significantly more than in arid climates like Arizona. An expansion gap that looks ugly in winter may disappear entirely during a humid summer. This is why acclimation is not a suggestion. It is a law. I have walked into houses where the floor was literally lifting off the subfloor because it was installed straight out of a cold truck into a hot house. If you are fixing a gap in the winter, be careful. If you fill it too tight, when summer comes, that floor will expand and crush your filler or, worse, buckle the planks. In humid areas, you almost always need to use a wider gap and hide it with a deeper undercut or a plinth block. You cannot fight nature. You can only hide the evidence of its movement. If you live near the coast, the salt air and moisture will make that HDF core act like a sponge. Always check the moisture content of your subfloor before you even think about laying a plank.
The tool kit for hiding mistakes
- Oscillating Multi-tool: Essential for cleaning out old debris from under the jamb.
- Suction Cup Floor Puller: Used to close gaps by shifting planks without disassembly.
- Color-Matched Acrylic Filler: The primary chemical bond for small shadow gaps.
- Low-Profile T-Molding: A last resort for gaps that are too wide to fill.
- Backer Rod: Foam inserts that provide a base for deep caulk beads.
Hiding gaps with architectural trim
Plinth blocks and decorative moldings offer a structural solution for oversized laminate gaps by covering the jamb base entirely. This method is often preferred in high-traffic entryways where topical fillers would eventually crack or discolor. A plinth block is basically a decorative piece of wood that sits at the base of the door casing. It is thicker than the casing and the baseboard. It gives you a clean, square surface to butt your floor against. It looks intentional. It looks like it was designed by an architect, not a guy trying to hide a mistake. When you install one, you cut out the bottom of the existing casing and slip the block in. It covers everything. It is the ultimate get-out-of-jail-free card for flooring installers. It also adds a touch of class to the room. I use them in old Victorian houses where the original door frames are all wonky and nothing is square. You cannot get a perfect fit on a door frame that was built in 1890. You use a plinth block and you walk away with a paycheck.
The myth of the waterproof click lock
Waterproof laminate marketing often leads to installation errors because homeowners assume the joints are hermetically sealed. In reality, moisture infiltration at the door frame gaps can lead to core swelling and permanent edge lifting. Even if the top is waterproof, the bottom is not. If you have a gap under your door frame and you mop the floor with too much water, that water is going to find its way into the gap. It will soak into the raw HDF core. The edges will swell like a sponge. Once that happens, the floor is ruined. There is no fixing a swollen edge. You have to replace the board. This is why sealing that gap is not just about looks. It is about protecting your investment. You want a seal that is water-resistant. Use a high-quality sealant and make sure it is packed in there. It creates a dam. It keeps the water on the surface where it belongs. I have seen $10,000 floors destroyed by a single overflowing sink because the installer didn’t seal the perimeters near the bathrooms and showers. It is a preventable tragedy.