Ever spent hours installing what you thought was a straightforward laminate floor, only to find it warped or uneven within months? Or perhaps you’ve tried to update your bathroom with a new shower, only to face leaks, mold, or a design that feels off. I remember my first DIY project — I was so eager to upgrade that I skipped some crucial steps, and it cost me more time and money than I expected. That lightbulb moment taught me a valuable lesson: good planning beats rushed decisions every time.
Why Choosing the Right Upgrades Matters Now More Than Ever
In today’s fast-paced world, home upgrades aren’t just about aesthetics; they’re investments in comfort, durability, and even value. Modern homes demand smart choices, especially when it comes to flooring and showers. Whether you’re aiming for a sleek, easy-to-maintain laminate or a luxurious shower that lasts for years, the key is understanding what works and what doesn’t. And trust me, the difference between a good renovation and a costly mistake often boils down to the right preparation and expert insights.
Have you ever faced the frustration of a poorly installed shower or uneven laminate flooring?
If you nodded yes, you’re not alone. I’ve been there, and I’ve learned that rushing through these projects without proper knowledge can lead to leaks, cracks, or even safety hazards. Early on, I made the mistake of skipping essential steps like proper surface preparation — a mistake I now know can be avoided with the right guidance. For example, understanding the importance of floor leveling can dramatically improve the longevity of your laminate floors. You might want to check out expert tips on floor leveling that helped me prevent such issues in my home.
So, what’s the secret to a successful renovation? It’s about knowing the right techniques, choosing quality materials, and sometimes, calling in the pros for those tricky steps. Today, I’ll share practical advice based on experience — from selecting the best laminate options to ensuring your shower is both stylish and durable — so you can avoid my mistakes and enjoy a space that truly elevates your home. Ready to dive into the details? Let’s get started!
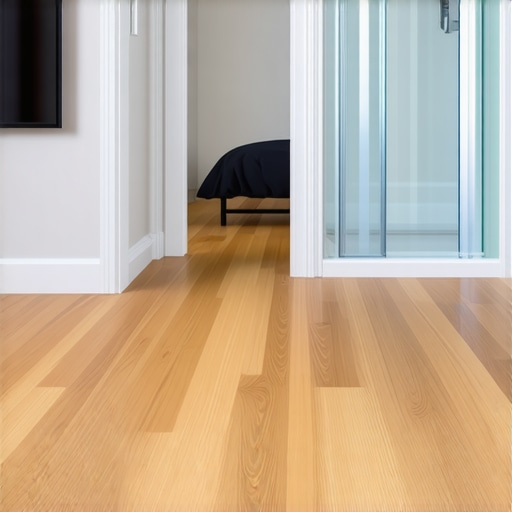
Prepare Your Surface Properly Before Laying Floors
When I tackled my first laminate flooring project, I overlooked the importance of surface preparation. I simply removed the old carpet and laid the new laminate directly on the uneven subfloor. The result was a warped, creaky floor that lasted less than a year. Since then, I learned that a smooth, level base is essential. Use a high-quality self-leveling compound to fix imperfections. For best results, check out laminate floor leveling tips to ensure your floor stays beautiful for years.
Level the Subfloor for Durable, Flawless Results
Leveling a subfloor isn’t glamorous, but it’s vital. I recommend renting a laser level or a long straightedge to identify high and low spots. Fill low areas with a self-leveling compound and sand down high spots. This process was messy, but it paid off by preventing future gaps and cracks. Remember, a perfectly leveled surface reduces stress on your flooring and increases longevity. For detailed guidance, see expert laminate floor leveling tips.
How to Smooth Out Uneven Floors
My experience with uneven floors taught me to take my time. I used a long, straight piece of wood to identify dips and bumps, then applied leveling compound accordingly. After drying, I sanded the surface lightly to prepare for flooring. This step is crucial because even the best laminate won’t hide imperfections. Proper leveling also prevents squeaks and buckling down the line.
Installing Showers Without Leaks or Mold
Installing a shower can seem daunting, but focusing on waterproofing makes all the difference. I once installed a shower without proper waterproofing, and within a year, mold and leaks appeared. Now, I always use a waterproof membrane or good-quality waterproofing paint behind tiles. Pay special attention to the seams and corners, applying a generous bead of sealant. For comprehensive tips, visit shower renovation tips to ensure your upgrade lasts.
Seal Every Corner and Joint
In my last project, I sealed the edges of the shower pan and the tile joints meticulously. This added layer of protection prevented water from seeping into walls or floors, saving me from future repairs. Use a high-quality silicone sealant, and make sure to let it cure completely before use. Proper sealing is the key to a leak-proof shower.
Choosing the Right Materials for Longevity
Material selection can make or break your project. I opted for water-resistant laminate and durable ceramic tiles for my bathroom. Avoid cheap materials that wear out quickly; instead, invest in products with good reviews and warranties. Check out premium materials for modern upgrades to get started.
Durability Over Aesthetics
While aesthetics matter, prioritize durability for high-traffic or moisture-prone areas. This approach saved me money and frustration over time, as my floors and showers remained pristine despite daily use.
Many homeowners operate under misconceptions when it comes to installing carpets, leveling floors, or renovating showers. Let’s dig deeper into these areas and uncover what most people get wrong, often without realizing the hidden nuances that can make or break a project.
Why the Biggest Myths About Carpet Installation Might Cost You
A common myth is that hiring cheaper installers guarantees savings. In reality, cutting corners during carpet installation can lead to uneven surfaces, wrinkles, or premature wear. Skilled installers pay attention to details like proper stretching and seam placement, which ensures durability and a flawless appearance. Skipping these steps might save money upfront, but the long-term costs of repairs or replacements far outweigh initial savings. For expert advice on ensuring your carpet stays beautiful and lasts, check out carpet installation tips.
Floor Leveling Is More Than Just Filling Gaps
Many believe that simply filling low spots with compound is enough when leveling a subfloor. But the real secret lies in understanding the substrate’s behavior over time. Uneven floors can cause laminate or hardwood to buckle or squeak. Advanced leveling involves precise measurements, using laser levels, and sometimes adding multiple layers of reinforcement to prevent future movement. Overlooking these nuances can lead to costly repairs within a few years. For detailed strategies, visit floor leveling expertise.
Showers Are Not Just About Good Tiles
Many assume that waterproofing is optional or superficial. However, waterproofing is the backbone of a leak-proof shower. A mistake I see often is relying solely on surface sealants without addressing the underlying membrane or proper slope. Proper shower installation involves a layered approach—using a waterproof membrane, correct slope for drainage, and high-quality sealants at joints. Ignoring these details might seem minor but can lead to mold, water damage, and structural decay. Want to avoid these nightmares? Read shower renovation tips.
Advanced Question: How Do You Ensure Long-Term Durability When Combining These Elements?
Combining proper flooring, leveling, and waterproofing requires understanding their interdependence. For example, an uneven subfloor beneath a moisture-resistant laminate or tile can cause cracks and gaps over time. Similarly, improper sealing in showers can lead to water seeping into even the best flooring, nullifying the investment. Experts recommend integrated planning—considering the specific materials, load-bearing requirements, and moisture levels. According to a study by the National Association of Home Builders, projects that incorporate comprehensive planning and quality materials reduce maintenance costs by up to 30% over a decade. Remember, thorough preparation and expert guidance are your best allies. Have you ever fallen into this trap? Let me know in the comments.
By understanding these hidden details and avoiding common pitfalls, you can significantly improve the longevity and appearance of your home upgrades. Don’t let superficial fixes undermine your efforts—invest in knowledge and quality craftsmanship for lasting results.
Maintaining your home upgrades such as flooring, showers, and carpets is crucial to ensure they remain beautiful and functional over time. From specialized equipment to routine checks, I’ve learned that the right tools and methods can make all the difference in preserving your investments. In this post, I’ll share the specific tools I rely on, how they help me, and what you should consider for long-term success.
Investing in Precision with Laser Levels
One of my most valuable tools is a high-quality laser level. Unlike traditional bubble levels, laser levels project a straight line across a room, providing precise measurements for leveling floors and aligning tiles. I personally use a laser level with a rotating head, which allows me to check multiple points simultaneously, saving time and improving accuracy. This is especially helpful when dealing with uneven subfloors or ensuring perfect grout lines in showers. As the trend in home renovation leans toward more precise craftsmanship, a laser level is becoming an essential staple. For detailed guidance, check out expert floor leveling tips.
The Power of Electric Saws and Tile Cutters
For cutting materials like laminate, tile, or even shower pans, I rely on a good circular saw with diamond blades and a wet tile cutter. A reliable saw ensures clean, straight cuts without chipping, which is vital for both aesthetic appeal and safety. I prefer models with adjustable cutting depth and laser guides, allowing me to handle various thicknesses and angles. These tools have become more affordable and durable, making them accessible for DIY enthusiasts who prioritize quality. Investing in these tools now means fewer mistakes and less frustration during maintenance or future upgrades. For more insights, visit laminate flooring maintenance tips.
Routine Checks with Moisture Meters and Sealants
Moisture meters are crucial for monitoring the health of your flooring and shower installations. I use a digital moisture meter that provides instant readings, helping me detect any hidden leaks or excess humidity early before they cause structural damage or mold. Regularly checking moisture levels, especially in bathrooms and kitchens, can save you thousands in repairs. Additionally, I recommend keeping high-quality silicone sealants and waterproof membranes on hand. Proper sealing, especially around joints and corners, prevents water infiltration and extends the life of your upgrades. For detailed sealing strategies, see shower waterproofing tips.
How do I maintain my flooring and showers over time?
Consistent maintenance is key. Regularly inspect for cracks, loose tiles, or signs of water damage. Clean surfaces with non-abrasive solutions and avoid harsh chemicals that can degrade sealants. For carpets, professional steam cleaning every 12-18 months helps preserve the fibers and appearance. Using the right tools, like microfiber mops or specialized cleaning agents, can make routine upkeep easier and more effective. As technology advances, expect smarter moisture sensors and automated sealing systems to become standard, simplifying maintenance further. Adopting these practices now will help your upgrades serve you well for decades.
What I Wish I Knew When I Started
The hardest lesson I learned about carpet install, floor leveling, showers, and laminate was the importance of patience and thorough preparation. Rushing often leads to mistakes that cost both time and money, like uneven floors or leaky showers. My lightbulb moment was realizing that investing in the right tools and expert guidance can prevent these pitfalls. For instance, I underestimated how crucial floor leveling is, which resulted in squeaks and cracks that haunted me for years. If I had known earlier about the importance of proper leveling, I would have saved myself so much trouble.
My Top Tools That Changed the Game
One of the most vital tools I rely on is a high-quality laser level. It’s amazing how this simple device can ensure perfectly even floors and straight tile lines, saving me from future headaches. I also swear by a good electric saw with diamond blades for precise cuts, which prevents chipping and waste. For moisture monitoring, a digital moisture meter has helped me catch early signs of water damage before it becomes serious. These tools are proven to make a difference, and I trust them because they’ve helped me achieve professional results even as a DIYer. Check out these expert tips for more tools that can elevate your home upgrade projects.
Taking Action to Protect Your Investment
The future of home upgrades depends on how well you maintain your improvements. Regular inspections for cracks, leaks, and water damage are essential. Using microfiber mops and non-abrasive cleaners preserves your flooring and showers, while routine moisture checks prevent mold growth. As technology advances, smarter sensors and automated sealing systems will make maintenance even easier. My advice is to start with a solid plan—know your materials, invest in quality tools, and don’t skip the details like sealing corners and joints. Your home’s beauty and durability will thank you for it, and you’ll enjoy peace of mind knowing your investments are protected for years to come.