Ever had that sinking feeling when you step onto your freshly installed laminate floor, only to see it beginning to ripple and peak like a restless wave? I remember the moment vividly. I was so proud of my DIY project—until I noticed a suspicious bump forming along the hallway. At first, I brushed it off, thinking it was just a minor flaw. But soon, that tiny peak grew, turning my beautiful new floor into a distorted mess. Frustration set in. I had invested time, money, and hope into creating a space I loved—only to face this persistent problem.
Why Laminate Peaking Shouldn’t Be Ignored
The truth is, floor peaking isn’t just an eyesore; it can signal deeper issues that threaten the longevity of your entire installation. If left unchecked, these peaks can lead to gaps, creaking sounds, and even damage to the integrity of your subfloor. Early on, I learned that improper installation, trapped moisture, or inadequate subfloor preparation are common culprits behind these unsightly waves. According to flooring experts, ignoring these signs can dramatically reduce the lifespan of your laminate and lead to costly repairs down the line. As one industry report states, poor subflooring is responsible for over 60% of laminate floor failures.
If you’ve experienced similar frustrations, you’re not alone. And here’s the good news: there are effective, proven fixes that can restore your floor’s smoothness and durability. In this article, I’ll walk you through four essential installation adjustments that will help you eliminate peaking once and for all. Whether you’re a seasoned DIYer or just starting, these tips are practical and accessible—no need for professional help (unless you want it!).
Is Floor Peaking Really a Big Deal or Just Cosmetic?
Now, I admit—initially, I thought it was just an aesthetic annoyance. But I made a costly mistake early on by overlooking moisture issues and not properly prepping my subfloor, which contributed to the peaking. That oversight almost doubled my repair costs. Don’t make the same mistake. Understanding the real impact of improper installation can save you time, money, and headache. Want to learn how to get it right? Keep reading for the specific fixes that will keep your laminate smooth and lasting well into 2026 and beyond.
Ready to tackle those peaks? Let’s dive into the solutions that helped me create a flawless, professional-looking floor—without the hefty price tag.
.
Prepare Your Workspace and Gather Tools
Start by clearing the area around the peaking spots and remove furniture. Gather essential tools: a rubber mallet, tapping block, adjustable wrench, flooring pull bar, leveling compound, furring strips, and a moisture meter. I once worked on a hallway where I overlooked moisture levels, leading to stubborn peaks; using a moisture meter helped me identify damp spots that needed drying first.
Assess the Subfloor Conditions
Inspect for unevenness or moisture issues. Use a long level across the peaking area; if you see gaps or dips, the subfloor might be uneven. Also, check for trapped moisture with a moisture meter—excess moisture causes expansion and peaking. I learned this the hard way when I ignored a damp patch, and the peaking worsened within days.
Fix Flatness and Remove Obstructions
Address Subfloor Bumps and Dips
Apply a self-leveling compound to smooth out dips; for bumps, sand down protrusions carefully. For deep dips, fill with appropriate patching material. During my DIY, I poured a leveling compound into a low patch and waited 24 hours before relaying the laminate, which resulted in a much smoother surface.
Ensure Proper Moisture Levels
If moisture levels are high, let the subfloor dry thoroughly or use a dehumidifier. Installing a vapor barrier, such as polyethylene sheeting, prevents moisture from rising. I sealed a damp subfloor with a vapor barrier before relaying laminate, preventing future peaking.
Reinstall the Laminate Flooring Correctly
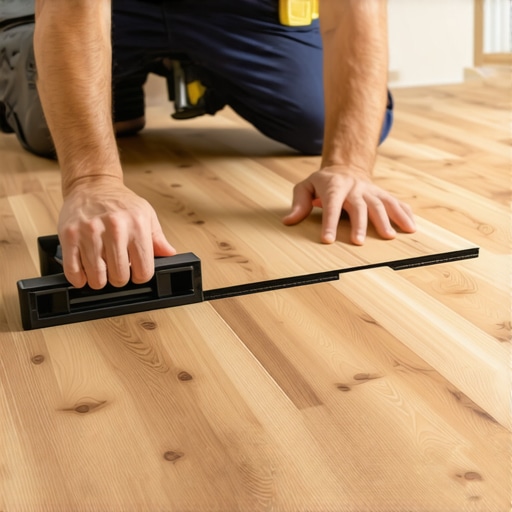
Lay down underlayment if not already installed, and ensure it’s unwrinkled. Use tapping blocks and a rubber mallet to snugly fit planks, avoiding gaps. When I relaid my floor, I carefully clicked each plank together, ensuring they were tightly connected—this eliminated loose sections that could lead to peaking.
Secure and Finish the Floor
If necessary, fasten loose planks with adhesive or bridging clips. Check for any areas that still lift and reinforce them using appropriate fasteners. I once added adhesive to a stubborn plank, which kept it secure and flattened the surface.
Regular Maintenance and Vigilance
Maintain proper humidity levels and periodically inspect for signs of moisture or movement. Promptly addressing issues prevents future peaks. I set up a humidity monitor in high-traffic areas, catching potential problems early.
For comprehensive subfloor fixes, visit this guide. Applying these targeted steps will restore your laminate’s smoothness and extend its lifespan, giving you that professional-looking finish you desire.
 While many assume that basic techniques suffice for floor leveling, carpet installation, and shower construction, the truth is far more nuanced. A common myth is that a perfectly flat surface is always achieved by simply applying a leveling compound or flat mortar. In reality, subtle variations, moisture gradients, and material interactions play crucial roles—even expert installers sometimes overlook these details. For example, insufficient curing time for leveling compounds can lead to minor cracks and unevenness that worsen over time, especially under the stresses of daily use. To avoid costly mistakes, it’s essential to understand the intricacies of material properties and installation sequences.
Have you ever assumed that applying adhesive uniformly guarantees a flawless carpet stretch? Think again. Excess adhesive can cause uneven tension and future wrinkling, a widespread oversight that traps air and moisture. Choosing the right type of adhesive and applying it in controlled amounts, combined with proper tension techniques, significantly improves longevity. According to industry experts, improper adhesive use is one of the leading causes of early carpet failure—so mastering this nuance is vital.
Switching over to showers, many believe that waterproofing is just about applying a sealant around joints. However, neglecting the importance of proper slope and drain placement leads to hidden leaks and mold growth. The real sophistication lies in creating a consistent slope of about 1/4 inch per foot to direct water efficiently toward the drain, preventing pooling behind tiles. A study published in the Journal of Building Engineering emphasizes that overlooking slope and waterproofing details results in over 40% of shower-related water damage cases—highlighting the importance of advanced planning.
What about the hidden risks most amateurs miss? One key mistake is failing to account for subfloor movement and expansion. A slight foundation shift or temperature fluctuation can cause your carefully leveled floors to develop gaps or peaking over months. This is especially true if the subfloor isn’t adequately prepared or if expansion gaps are overlooked, leading to floor buckling or cracking. For a more comprehensive approach, I recommend reviewing detailed guides on subfloor preparation and levelling, like those on [here](https://floorcraftstore.com/3-subfloor-leveling-fixes-to-stop-laminate-clicking-2026) and [here](https://floorcraftstore.com/stop-hidden-shower-leaks-4-waterproofing-hacks-for-2026).
Deepening your knowledge beyond the basics ensures not only aesthetic appeal but also long-term durability and safety. Small oversights today could lead to significant repairs tomorrow. Have you ever fallen into this trap? Let me know in the comments and share your experiences. For a detailed understanding of what can go wrong and how to fix these issues effectively, exploring resources on advanced installation techniques is invaluable.
Achieving a flawless floor or shower installation is only half the battle; maintaining that perfection over the long haul requires the right tools and consistent upkeep. As someone who has navigated the complexities of DIY flooring and bathroom renovations, I can attest that investing in quality equipment and employing strategic maintenance practices pay dividends over time.
The Essential Tools for Ongoing Maintenance
One of my go-to devices is a high-accuracy moisture meter. Moisture imbalances are often the root cause of issues like laminate peaking or tile cracking. I prefer digital pin-type meters, such as the [Protimeter Surveymaster](https://floorcraftstore.com/expert-floor-leveling-laminate-flooring-for-lasting-durability-2), because they provide precise readings and are durable. Regularly checking subfloor moisture levels—especially in high-humidity environments—helps prevent future problems. Additionally, leveraging a quality vacuum with HEPA filters keeps dust and debris from settling into seams or cracks, preserving surface integrity.
Another vital tool is a floor roller or laminate press. When I notice minor gaps or uneven planks, gently rolling the surface with a hand press can reseat planks without removing them entirely. This approach conserves the initial investment and maintains a smooth appearance. For shower maintenance, I recommend a handheld steam cleaner; it’s excellent for sanitizing grout lines without harsh chemicals, ensuring mold and mildew don’t take hold over time. Incorporating a waterproofing membrane tester, such as a simple dye penetrant kit, allows you to verify the integrity of waterproof layers periodically, preventing unseen leaks from causing long-term damage.
Software and Scheduling Tools to Keep On Top of Maintenance
Beyond physical tools, scheduling regular inspections using digital planners or apps like Trello ensures nothing slips through the cracks. Setting monthly or quarterly reminders for moisture checks, grout sealing, and caulking renewal can drastically extend the lifespan of your installations. I personally use a dedicated spreadsheet where I log maintenance dates, findings, and any corrective actions taken. This habit helps me spot patterns—like recurring moisture issues—that might require professional intervention.
Where Do I See This Going in the Future?
The trend toward smart home integration is unstoppable. Imagine sensors embedded in flooring or showers that monitor humidity levels, detect leaks, and notify you immediately via your smartphone. Companies are beginning to develop IoT-enabled tools that can automate maintenance alerts, potentially saving homeowners thousands in repairs. This evolution will make upkeep less of a chore and more of an integrated component of home management.
How do I Maintain Floors and Showers Over Time? What’s the Best Approach?
Consistency is key. Regularly vacuum and clean surfaces with appropriate products to prevent buildup that can undermine seals. Check grout, caulking, and waterproof membranes at least twice a year, re-sealing or replacing as necessary. Use moisture meters periodically, especially after heavy rains or humidity spikes, to catch issues early. For laminate floors, maintaining stable indoor humidity levels—ideally between 35-50%—prevents expansion or contraction that causes gaps or peaking. Incorporating these practices, along with advanced tools like moisture meters and smart sensors, can keep your installations looking pristine for decades. For more on protecting your flooring investments, explore the article on [carpet installation and floor leveling tips for lasting home comfort](https://floorcraftstore.com/carpet-install-floor-leveling-tips-for-lasting-home-comfort-3).
Don’t hesitate to try deploying a moisture meter in your next project—it’s a game-changer for proactive maintenance and peace of mind. Making these small but strategic investments will ensure your floors and showers serve you reliably, year after year.
,
The Hardest Lesson I Learned About Floor Leveling, Carpet Installation, Laminate, Showers
The most surprising insight came when I realized that even minor moisture miscalculations could sabotage my entire project, despite following step-by-step guides. That lightbulb moment taught me to always double-check subfloor moisture levels before proceeding, saving me from costly reroutes. Sometimes, what seems like a small detail—like setting aside extra curing time—can make the difference between success and headache.
3 Myths About Floor Leveling, Carpet Install, Laminate, Showers That Held Me Back
- Flat surfaces are easy to achieve with simple leveling compounds. The reality is, material interactions and curing times require careful planning, or else you risk cracks and unevenness.
- Adhesives alone guarantee a smooth, long-lasting finish. Proper tension and controlled application are equally crucial—over-application can trap moisture and cause future problems.
- Every subfloor is the same, so one-size-fits-all solutions work. In fact, inspecting for specific issues like dips, bumps, or moisture with tools like a moisture meter ensures tailored fixes for lasting quality.
Where to From Here for Your Home
Investing in high-quality tools, such as a reliable moisture meter and a hand roller, has transformed my approach. Using a moisture meter regularly helps me catch issues early, preventing peaking or buckling. Pairing this with curated resources like expert guides on floor leveling ensures I’m always steps ahead. Additionally, exploring tools like tile waterproofing testers or planning apps enhances my maintenance routine and long-term success.
Your Turn to Try Something New
Remember, mastering your floors and showers isn’t just about following steps—it’s about understanding the nuances that make the difference in longevity and appearance. I encourage you to embrace the learning process, investing in quality tools and resources that empower you. Every successful project boosts confidence and transforms your home into a space of comfort and pride.
What’s one unexpected mistake you’ve made during an installation, and how did you fix it? Share your experience below—I’d love to hear your story!
,