The ‘Wet Sponge’ Test for Porous Tile Sealing
The physics of surface tension and the wet sponge test
I once spent three days grinding concrete on a job last month just so the floor wouldn’t click like a castanet. Most guys skip the leveling compound. They think the underlayment will hide the dip. It won’t. I have seen thousand-dollar tile jobs fail because the installer was too lazy to run a straight edge across the slab. When you are dealing with natural stone or high-end ceramics, the subfloor is your foundation, but the surface chemistry is your shield. If you do not understand the rate of absorption in your material, you are inviting structural rot and permanent staining into your home. This is especially true in wet environments like showers where water management is the difference between a lifetime floor and a moldy disaster. Before you even think about opening a bucket of thin-set, you need to perform the wet sponge test to determine the porosity of your material.
The reason porosity determines your installation success
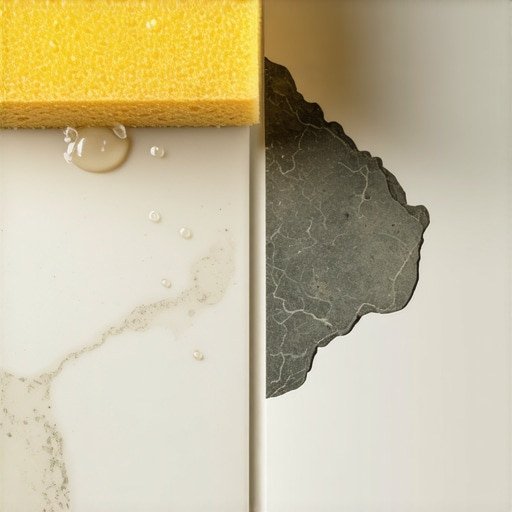
A wet sponge test is the industry standard for identifying porous tile by measuring capillary action and surface tension. By placing a saturated sponge on the tile surface, you can observe how quickly moisture penetrates the material. High-porosity stones like travertine require immediate sealing to prevent damage. This test is the only way to verify if your stone is ready for grout or if it will soak up the grout pigments, leading to permanent picture-framing around every edge. Most homeowners think that a hard surface is a sealed surface. That is a dangerous lie. Even dense-looking slate can have a high absorption rate that will pull water deep into the stone, dragging minerals and salts to the surface during evaporation.
“A floor is only as good as the subfloor beneath it; deflection is the enemy of every joint.” – Master Flooring Axiom
The molecular chemistry of water absorption in stone
Water molecules are polar, meaning they have a positive and a negative charge that allows them to cling to surfaces and pull themselves into microscopic voids. This is known as capillary action. When you place a wet sponge on a piece of unsealed limestone, the stone acts like a vacuum. The small pathways within the rock structure pull the liquid inward. If those voids are not filled with a high-quality penetrating sealer, they will eventually fill with soap scum, oils, or dirty mop water. In a shower install, this becomes a hygiene issue. A tile that fails the wet sponge test is essentially a hard sponge itself. You must use an impregnating sealer which uses silanes or siloxanes to line these pores with a hydrophobic coating. This does not plug the hole, it simply makes the surface of the pore repel water while still allowing the stone to breathe. This is a common point of failure in floor leveling projects where moisture from the self-leveling compound is trapped under a non-breathable sealer, causing the bond to fail from the bottom up.
How to perform the wet sponge test properly
The wet sponge test requires a clean, dry tile sample and a high-density polyester sponge saturated with distilled water. You must place the sponge on the tile for exactly ten minutes to allow for capillary migration. If a dark ring or ghosting remains after the sponge is removed, the tile is porous. You should test multiple pieces from different boxes because natural stone varies wildly in density. One crate of marble might be tight as a drum while the next one is as thirsty as a desert. If you are installing laminate or carpet install nearby, keep the water away from those materials. Laminate cores are notorious for swelling at the slightest hint of moisture, and once those edges peak, there is no way to fix them without replacement.
| Tile Material | Porosity Level | Absorption Rate | Recommended Sealer Type |
|---|---|---|---|
| Polished Porcelain | Ultra Low | Less than 0.5% | Nano-sealer only |
| Travertine | High | 3% to 10% | Solvent-based impregnator |
| Slate | Medium | 1% to 5% | Oil-resistant sealer |
| Limestone | Very High | 5% to 15% | High-solids siloxane |
The danger of over-sealing and the click-lock myth
While most people want the thickest underlayment, too much cushion actually causes the locking mechanisms on LVP to snap under pressure. The same logic applies to tile sealers. If you apply too much sealer to a tile that has low porosity, you will end up with a sticky, white residue known as blooming. This happens because the sealer cannot penetrate the surface and ends up drying on top. This residue is a magnet for dust and hair. It is a nightmare to remove. You need to understand the mil-thickness of your wear layers and the density of your grout. Many modern grouts come pre-sealed, but the tile itself might still be thirsty. Always check the manufacturer specifications before assuming a product is waterproof. In places with high humidity like the swampy conditions of Houston, the moisture in the slab will constantly try to push upward. If you have sealed the top of the tile too tightly, that moisture pressure can actually pop the tiles off the thin-set bed.
Preparation steps for a successful tile seal
Proper tile sealing begins with a pH-neutral cleaning to remove all dust and debris from the micropores. You must ensure the surface temperature is between fifty and eighty degrees Fahrenheit to allow for proper chemical bonding. Use a lint-free applicator to apply the sealer in a thin, even coat, ensuring no puddling occurs in the grout joints. Follow these specific steps to ensure the job is done right the first time.
- Clean the tile with a vacuum and a damp microfiber cloth.
- Perform the wet sponge test on three separate areas of the floor.
- Wait for the tile to be bone-dry, usually twenty-four hours after cleaning.
- Apply the first coat of sealer using a circular motion.
- Wipe away excess sealer after five minutes to prevent hazing.
- Wait six hours before applying a second coat if the stone is highly porous.
- Do not allow foot traffic for at least twenty-four hours.
“Porosity is the invisible variable that ruins more floors than bad subfloors ever could; respect the void.” – Master Flooring Axiom
Integrating tile with carpet and laminate transitions
When you finish your tile work, the carpet install or laminate transition is where the structural engineering becomes visible. A carpet install requires a tack strip set precisely one-quarter inch away from the tile edge to allow for a clean tuck. If your tile is too high because you used too much floor leveling compound, you will have a tripping hazard. This is where the tired architect in me misses the old days of site-finished wood. With laminate, you must leave an expansion gap of at least three-eighths of an inch. If you butt the laminate tight against your newly sealed tile, the floor will buckle the first time the humidity spikes. The floor needs to breathe. It needs to move. A floor is a living system of expanding and contracting materials. If you lock it down too tight, it will find a way to break free. Usually, that means a loud pop in the middle of the night and a ruined locking joint. Pay attention to the details. Treat the subfloor like a structural slab and the tile surface like a scientific experiment. That is how you build a floor that lasts for a generation.
{“@context”: “https://schema.org”, “@type”: “HowTo”, “name”: “The Wet Sponge Test for Tile Porosity”, “step”: [{“@type”: “HowToStep”, “text”: “Clean the tile surface thoroughly.”}, {“@type”: “HowToStep”, “text”: “Place a saturated sponge on the tile for ten minutes.”}, {“@type”: “HowToStep”, “text”: “Remove sponge and check for darkening or moisture absorption.”}, {“@type”: “HowToStep”, “text”: “Determine if a penetrating sealer is required based on results.”}]}