Ever stepped onto a laminate floor only to feel that unsettling bounce or unevenness beneath your feet? I had that moment in my first home renovation attempt. The excitement of a fresh new look quickly faded when I realized my flooring was uneven, causing gaps and a wobbly feel that just wouldn’t go away. It was a lightbulb moment for me—underestimating the importance of proper floor leveling and quality installation can turn a beautiful upgrade into a frustrating experience.
Why Proper Floor Leveling and Laminate Flooring Matter
Choosing the right laminate flooring is just half the battle. The real challenge is ensuring the subfloor is perfectly level. An uneven surface can lead to issues like cracking, warping, or even premature wear. According to a study by the National Wood Flooring Association, improper subfloor preparation accounts for nearly 70% of flooring failures within the first five years. That fact blew my mind—imagine investing in stunning flooring only to see it buckle or develop unsightly gaps over time. Proper leveling not only guarantees a sleek, professional look but also extends the lifespan of your flooring, saving you money and headaches down the line.
Have you faced uneven floors that ruined your renovation plans? You’re not alone. Many homeowners overlook this critical step, thinking that the flooring material itself will hide imperfections. But trust me, even the most durable laminate won’t perform well on an uneven base. I learned this the hard way early on, rushing through subfloor prep and paying the price with costly repairs later. To avoid this mistake, I recommend following expert floor leveling tips that ensure your subfloor is smooth and solid before laying down your new laminate. Want to know the secrets I discovered? Read on, and I’ll guide you through the essential steps to achieve a flawless, long-lasting finish.Next Steps: How to Prepare Your Floor for Lasting Durability
Now that you understand why floor leveling is so crucial, it’s time to dive into practical tips and tricks. From assessing your current subfloor to selecting the right leveling compounds, I’ll share everything you need to know to make your laminate flooring last for years to come. Ready to transform your space? Let’s get started on creating a durable, beautiful floor that stands the test of time.
Assess Your Existing Subfloor
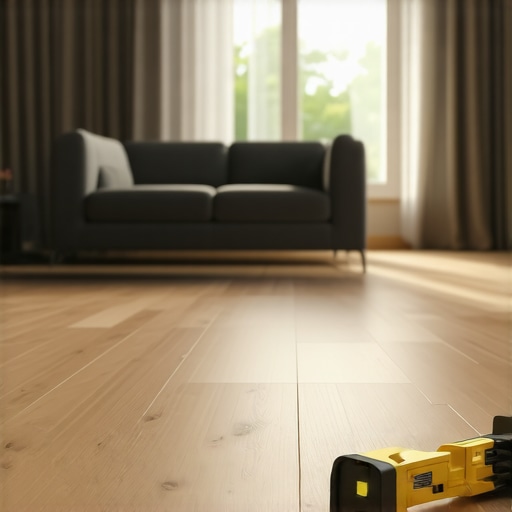
Start by thoroughly inspecting your current subfloor. Remove any debris, loose particles, and old flooring remnants. Use a long level or a straightedge to identify high and low spots. For example, I once used a 4-foot level across my living room and noticed a significant dip in one corner that caused my laminate planks to buckle. Identifying these uneven areas early prevents costly mistakes later.
Clean and Prepare the Surface
Before applying any leveling compound, ensure the surface is clean, dry, and free of dust or grease. Vacuum thoroughly and wipe with a damp cloth if necessary. A clean surface ensures better adhesion of the leveling material, reducing the risk of future movement or cracking.
Choose the Right Leveling Compound
Select a high-quality self-leveling compound designed for flooring. These compounds are like liquid cement that flows smoothly to fill gaps and smooth out uneven surfaces. For instance, I opted for a polymer-modified self-leveling underlayment which provided excellent durability and easy mixing. Check the manufacturer’s instructions carefully to mix the compound to the correct consistency.
Mix and Pour the Compound
Mix the compound in small batches to prevent it from setting before application. Pour it onto the low areas, starting from the center of the dip and working outward. Use a trowel or a long-handled squeegee to spread the compound evenly. Think of it like spreading pancake batter—smooth and consistent. During my project, I worked in sections, pouring and spreading the compound in stages, which helped me control the flow and achieve a perfectly level surface.
Use a Squeegee or Trowel for Smoothing
Immediately after pouring, use a squeegee or trowel to help the compound settle into all crevices and ensure an even surface. Run the tool in a sweeping motion, maintaining a constant pressure. This step is critical; I learned this the hard way when skipping smoothing, resulting in a wavy floor that later caused laminate gaps.
Allow Proper Curing Time
Follow the manufacturer’s drying time instructions—usually 24 to 48 hours. Avoid walking on the surface during this period. Patience here pays off; rushing the process can lead to imperfections or shifting of the leveling layer.
Check the Levelness Again
Once cured, recheck the surface with your level. If any areas are still uneven, apply additional compound and repeat the smoothing process. I found that a second application was necessary in some spots to perfect the flatness, especially near doorways and corners.
Install Your Laminate Flooring
With a perfectly level subfloor, proceed to lay down your laminate flooring. The smooth base ensures the planks lock tightly and lay flat, preventing gaps and buckling. For optimal results, follow the specific installation instructions for your flooring type, and consider using spacers to maintain expansion gaps around the edges.
By meticulously following these steps, I transformed my uneven subfloor into a sturdy, flawless base that significantly extended the life of my laminate flooring. Remember, proper preparation is the foundation of durable and beautiful floors. For more detailed techniques, check out these expert leveling tips.
While many homeowners understand the importance of proper floor leveling, there are nuanced pitfalls that often go unnoticed, leading to subpar results or even premature flooring failure. Let’s dig deeper into these common misconceptions and advanced mistakes to watch out for, so you can achieve a flawless, durable laminate floor.
Myth: All leveling compounds are created equal
One of the biggest mistakes is assuming that any self-leveling compound will do. In reality, different projects require specific formulations. For instance, polymer-modified compounds are more durable and better suited for high-traffic areas, whereas basic compounds might suffice for less critical zones. Using the wrong type can result in cracks, delamination, or uneven settling over time. According to a study published by the National Wood Flooring Association, choosing the right leveling material is crucial for long-term stability. Always check product specifications and consult with experts if unsure.
Common Trap: Overlooking the importance of moisture barriers
Many homeowners and even some professionals neglect moisture considerations during leveling. Moisture can seep into the subfloor, causing swelling, warping, and eventual failure of the laminate. Incorporating a high-quality moisture barrier before applying leveling compounds is essential, especially in basements or ground-level floors. Skipping this step might seem minor initially but can lead to costly repairs down the line. I learned this the hard way when my laminate started buckling after a year, and it turned out I hadn’t addressed moisture properly. Protect your investment by including moisture barriers as part of your prep.
Advanced Question: How does subfloor material influence leveling strategy?
The type of subfloor—whether concrete, plywood, or existing flooring—significantly impacts your leveling approach. Concrete slabs often require patching and crack repair before leveling, while plywood subfloors might need additional reinforcement to prevent flexing. For uneven concrete, a primer and specific bonding agents improve the adhesion of leveling compounds. In my experience, neglecting the subfloor material’s properties can cause the leveling layer to shift or crack over time, defeating the purpose of your effort. Consulting with flooring specialists or referring to manufacturer guidelines ensures you select the right method tailored to your subfloor type.
Remember, meticulous planning and understanding these nuances can save you from costly mistakes and ensure your laminate flooring lasts for years. Have you ever fallen into this trap? Let me know in the comments. For more expert advice, explore these advanced leveling tips.
Keeping your laminate flooring in top condition requires more than just proper installation; it involves consistent maintenance and the right tools to ensure durability over the years. In this guide, I’ll share the specific equipment and methods I personally rely on to maintain my floors, along with insights into future trends that might influence how we care for these surfaces.
Personal Tools I Recommend for Maintenance
First and foremost, I swear by a high-quality microfiber dust mop for daily cleaning. Unlike traditional brooms, microfiber traps dust and debris without scratching the surface. I recommend the O-Cedar Microfiber Flip Mop because it’s lightweight, easy to maneuver, and washable, making it ideal for routine upkeep. For deeper cleaning, I use a laminate-specific floor cleaner like this specialized cleaner which is formulated to remove grime without damaging the finish.
To tackle stubborn stains or grime buildup, I employ a soft-bristled nylon scrub brush. It’s gentle enough to avoid scratching but effective at dislodging dirt in grooves or textured areas. When dealing with spills, I always keep a set of microfiber cloths and a spray bottle filled with water and a few drops of mild dish soap—quick action prevents staining or warping.
Tools for Long-Term Maintenance
For periodic inspections, I use a digital moisture meter to ensure the subfloor isn’t absorbing excess moisture, which can compromise laminate integrity. Regular testing helps me catch potential issues early, especially in humid climates. Additionally, I keep a small, portable vacuum with a soft brush attachment for spot cleaning and removing debris from between planks.
In terms of maintenance, maintaining the expansion gaps around the perimeter of your floor is crucial. I use plastic spacers during cleaning or furniture rearrangement to prevent pushing the planks out of alignment. When it’s time for a more thorough refresh, I rely on a laminate floor polisher—like the Shark Multi Surface Floor Cleaner—which provides a gentle buffing action to restore shine without damaging the surface.
Predicting Future Trends in Flooring Maintenance
Looking ahead, I believe smart sensors and IoT devices will play a bigger role in flooring maintenance. Imagine a moisture sensor that alerts you via your smartphone when humidity levels rise beyond safe limits, preventing warping before it happens. Additionally, advances in self-healing coatings could reduce the frequency of cleaning and repairs, keeping floors looking pristine longer with less effort.
How do I maintain laminate flooring over time?
The key to long-lasting laminate lies in proactive care. Regularly cleaning with microfiber tools, avoiding excess water, and inspecting for moisture issues are vital. Incorporating advanced tools like moisture meters and considering future innovations such as self-healing surfaces can significantly extend your flooring’s lifespan. I recommend trying out a moisture test every few months, especially if you live in a humid environment, to stay ahead of potential problems.
By investing in the right maintenance tools and staying vigilant, you ensure your laminate flooring remains beautiful and durable for years to come. Want to see how a moisture meter can save you headaches? Check out these expert tips for more insights into long-term care.
The Hardest Lesson I Learned About Floor Leveling
One of the most valuable lessons I learned was the importance of patience and thorough inspection before starting the installation. Rushing through the subfloor assessment led me to overlook subtle dips that later caused buckling. Taking the time to identify and address these issues early saved me from costly repairs and frustration down the line.
3 Myths About Floor Leveling That Held Me Back
I used to believe that any self-leveling compound would work for my project. Turns out, not all compounds are created equal—selecting the right formulation based on your subfloor material and environment is crucial. Additionally, I thought moisture barriers were optional, but neglecting them led to warping in my laminate. Disproving these myths transformed my approach and improved my results.
What Experts Won’t Tell You About Achieving a Perfect Subfloor
Many professionals keep quiet about the importance of proper curing time and the subtle angle of pouring leveling compounds. I learned that rushing this step compromises the entire floor. Listening to expert advice and allowing adequate drying time ensures a smooth, durable surface that lasts.
Curated Recommendations for Lasting Durability
My Essential Toolkit for Floor Leveling includes a high-quality laser level for precise measurements, which I trust because it guarantees accuracy. I also recommend the premium leveling compounds I found easy to work with and long-lasting. For guidance, the book “The Complete Guide to Floor Preparation” has been invaluable in understanding the nuances of subfloor prep. Lastly, consulting with a flooring specialist from trusted sources ensures tailored solutions, saving time and money.
Your Turn to Try the Art of Floor Leveling
Now, armed with insider wisdom and reliable resources, I encourage you to approach your laminate flooring project with confidence. Remember, a perfectly leveled subfloor is the foundation of a stunning, long-lasting floor. Don’t be afraid to invest the time and effort—your future self will thank you for the smooth, durable surface you create today.
Have you ever struggled with identifying uneven spots in your subfloor? Share your experience below, and let’s learn together how to master this essential step for flawless laminate flooring!